Content studio
Write and manage blog posts
Create polished bilingual posts, upload cover images, and review existing articles in a cleaner editorial workspace.
Published articles
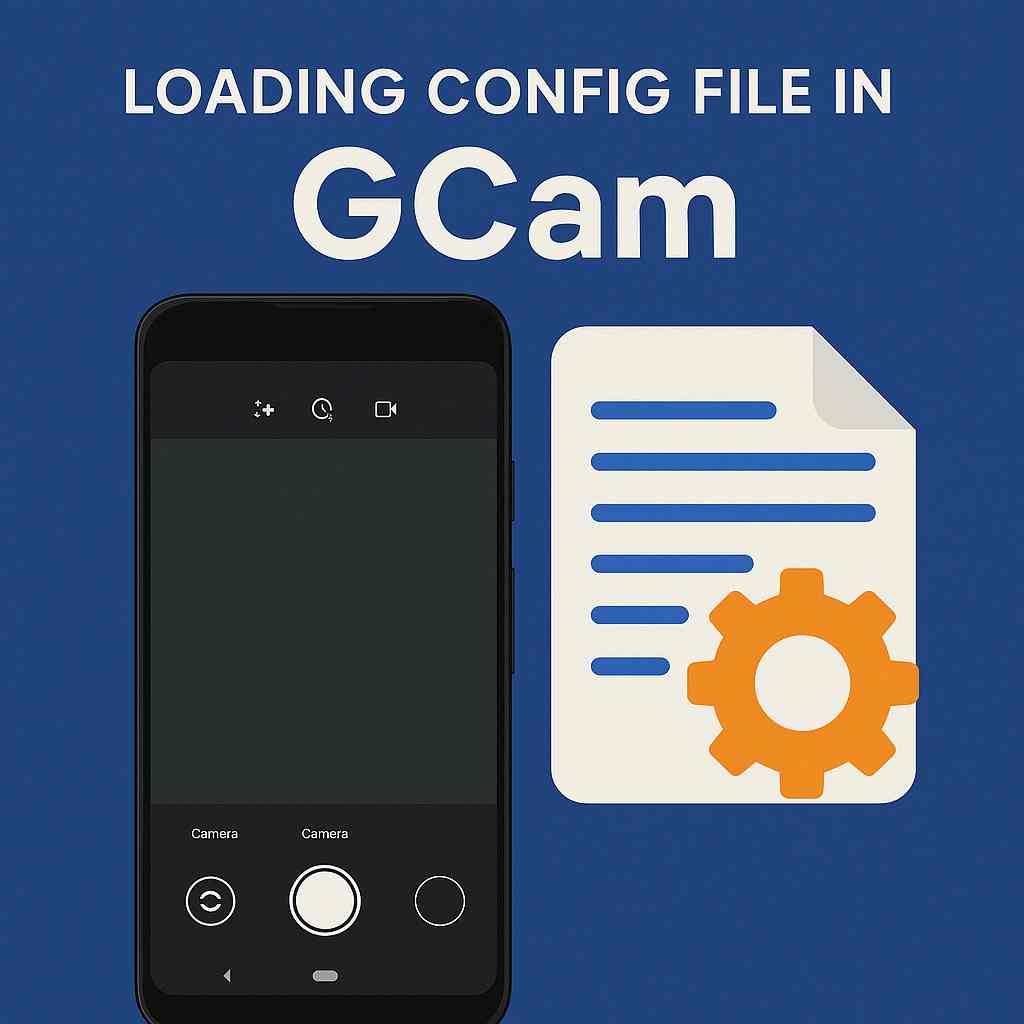
How to load config files in GCam? From GCamator
¿Cómo cargar archivos de configuración en GCam? Desde GCamator
<article> <header> <p>Unlock the full potential of your Google Camera with custom configurations!</p> </header> <section> <h2>What are GCam Config Files?</h2> <p>GCam, or Google Camera, is a powerful photography app that can significantly enhance the image quality of your Android device. While the default settings are impressive, the true magic often lies in <strong>custom config files</strong>. These files, typically with a <code>.xml</code> extension, are created by experienced GCam users and photographers to fine-tune various camera parameters. They can adjust things like:</p> <ul> <li><strong>Image Processing:</strong> Sharpening, noise reduction, HDR+, and color science.</li> <li><strong>Camera Settings:</strong> ISO limits, white balance presets, and focus modes.</li> <li><strong>Specific Lens Optimization:</strong> Tailoring settings for the main, ultrawide, or telephoto lenses.</li> </ul> <p>By loading the right config file, you can transform your GCam experience, achieving photos that are sharper, more vibrant, and better exposed, often rivaling dedicated cameras.</p> </section> <section> <h2>Introducing GCamator</h2> <p>While manually finding and applying config files can be a tedious process, tools like <strong>GCamator</strong> streamline this experience. GCamator is a popular application designed to help users find, download, and load GCam mods and their corresponding config files for their specific device. It acts as a central hub, making the complex world of GCam customization accessible to everyone.</p> </section> <section> <h2>Step-by-Step Guide to Loading Config Files with GCamator</h2> <h3>1. Download and Install GCamator</h3> <p>First things first, you'll need to get GCamator on your device. You can usually find the latest version from reputable Android forums or their official sources. Install the APK file like you would any other application.</p> <h3>2. Find Your GCam Mod</h3> <p>Open GCamator. The app will typically scan your device or allow you to search for compatible GCam mods. Select the GCam mod that is recommended or known to work well for your specific phone model..</p> <h3>3. Locate and Download Config Files</h3> <p>After finding relevant GCam, click Start Download button and download both APK and XML config file(if specific APK has XML config file)</p> <h3>4. Prepare the GCam Config Folder</h3> <p>This is a crucial step. GCam mods look for config files in a specific folder structure. GCamator usually assists with this, but understanding it is helpful:</p> <ul> <li>On your phone's internal storage, navigate to the root directory.</li> <li>Create a new folder named <code>GCam</code>.</li> <li>Inside the <code>GCam</code> folder, create another folder named <code>Configs</code> for 6.x version (or <code>Configs7</code>,<code>Configs8</code>, <code>Configs9</code>, etc., depending on the GCam version you are using).</li> </ul> <h3>5. Move the Downloaded Config File</h3> <p>Take the downloaded <code>.xml</code> config file and move it into the newly created <code>Configs7</code> (or equivalent) folder within your <code>GCam</code> directory.</p> <h3>6. Load the Config in GCam</h3> <p>Now, open your GCam app. To load the config:</p> <ul> <li>Double-tap the black area around the shutter button.</li> <li>A dialog box should appear listing the available config files in the folder.</li> <li>Select the config file you just moved.</li> <li>Tap "Restore" or "Load."</li> </ul> <p>Your GCam app will then restart with the new settings applied.</p> </section> <footer> <p>By following these steps with GCamator, you can easily load custom config files and elevate your mobile photography to new heights. Happy shooting!</p> </footer> </article>
<article> <header> <p>¡Desbloquea todo el potencial de tu Google Camera con configuraciones personalizadas!</p> </header> <section> <h2>¿Qué son los archivos de configuración de GCam?</h2> <p>GCam, o Google Camera, es una potente aplicación de fotografía que puede mejorar significativamente la calidad de imagen de tu dispositivo Android. Aunque los ajustes predeterminados son impresionantes, la verdadera magia suele estar en los <strong>archivos de configuración personalizados</strong>. Estos archivos, normalmente con extensión <code>.xml</code>, son creados por usuarios experimentados de GCam y fotógrafos para ajustar diversos parámetros de la cámara. Pueden modificar cosas como:</p> <ul> <li><strong>Procesamiento de imagen:</strong> nitidez, reducción de ruido, HDR+ y ciencia del color.</li> <li><strong>Ajustes de cámara:</strong> límites de ISO, preajustes de balance de blancos y modos de enfoque.</li> <li><strong>Optimización de lentes específicas:</strong> ajustes personalizados para la lente principal, gran angular o teleobjetivo.</li> </ul> <p>Al cargar el archivo de configuración adecuado, puedes transformar tu experiencia con GCam, logrando fotos más nítidas, vibrantes y mejor expuestas, a menudo comparables con cámaras dedicadas.</p> </section> <section> <h2>Presentando GCamator</h2> <p>Mientras que encontrar y aplicar manualmente archivos de configuración puede ser un proceso tedioso, herramientas como <strong>GCamator</strong> simplifican esta experiencia. GCamator es una aplicación popular diseñada para ayudar a los usuarios a encontrar, descargar y cargar mods de GCam y sus correspondientes archivos de configuración para su dispositivo específico. Actúa como un centro central, haciendo que el complejo mundo de la personalización de GCam sea accesible para todos.</p> </section> <section> <h2>Guía paso a paso para cargar archivos de configuración con GCamator</h2> <h3>1. Descarga e instala GCamator</h3> <p>Lo primero es obtener GCamator en tu dispositivo. Normalmente puedes encontrar la última versión en foros de Android de confianza o en sus fuentes oficiales. Instala el archivo APK como cualquier otra aplicación.</p> <h3>2. Encuentra tu mod de GCam</h3> <p>Abre GCamator. La aplicación generalmente escaneará tu dispositivo o te permitirá buscar mods de GCam compatibles. Selecciona el mod recomendado o el que se sabe que funciona bien para tu modelo de teléfono específico.</p> <h3>3. Localiza y descarga archivos de configuración</h3> <p>Después de encontrar el GCam relevante, pulsa el botón de descarga y obtén tanto el APK como el archivo de configuración XML (si el APK específico tiene archivo XML).</p> <h3>4. Prepara la carpeta de configuración de GCam</h3> <p>Este es un paso crucial. Los mods de GCam buscan archivos de configuración en una estructura de carpetas específica. GCamator suele ayudar con esto, pero entenderlo es útil:</p> <ul> <li>En el almacenamiento interno de tu teléfono, navega al directorio raíz.</li> <li>Crea una nueva carpeta llamada <code>GCam</code>.</li> <li>Dentro de la carpeta <code>GCam</code>, crea otra carpeta llamada <code>Configs</code> para la versión 6.x (o <code>Configs7</code>, <code>Configs8</code>, <code>Configs9</code>, etc., dependiendo de la versión de GCam que estés usando).</li> </ul> <h3>5. Mueve el archivo de configuración descargado</h3> <p>Toma el archivo de configuración <code>.xml</code> descargado y muévelo a la carpeta <code>Configs7</code> (o equivalente) dentro de tu directorio <code>GCam</code>.</p> <h3>6. Carga la configuración en GCam</h3> <p>Ahora abre tu aplicación GCam. Para cargar la configuración:</p> <ul> <li>Haz doble toque en el área negra alrededor del botón de disparo.</li> <li>Debería aparecer un cuadro de diálogo con los archivos de configuración disponibles en la carpeta.</li> <li>Selecciona el archivo de configuración que acabas de mover.</li> <li>Pulsa “Restaurar” o “Cargar”.</li> </ul> <p>Tu aplicación GCam se reiniciará con los nuevos ajustes aplicados.</p> </section>

GCam port alternatives(If GCam doesn't work)
Alternativas a los puertos de GCam (si GCam no funciona)
<h2>High-Quality Camera Apps for Your Smartphone</h2> <p>Google Camera (GCam) is known for producing excellent photos, but it's only officially available on Pixel devices. However, the enthusiastic developer community has created GCam ports that bring many of its features to other Android smartphones. But what if you can't find a compatible GCam port or want to try something different? Here are some worthy alternatives:</p> <h3>1. Open Camera</h3> <p>Open Camera is an open-source camera app that values simplicity, customization, and privacy. It offers manual controls for ISO, shutter speed, focus, and white balance. Additionally, it includes features like HDR, panorama mode, and support for external microphones. Open Camera does not contain any advertisements or in-app purchases, making it a great choice if you're concerned about privacy.</p> <h3>2. Adobe Lightroom</h3> <p>While primarily known as a photo editing tool, Adobe Lightroom also offers an advanced camera app for mobile devices. It provides RAW capture, manual settings for exposure, ISO, shutter speed, and white balance, as well as various presets and professional-grade editing tools. The app is free to download but requires a Creative Cloud subscription for certain features.</p> <h3>3. Camera FV-5</h3> <p>Camera FV-5 focuses on delivering DSLR-like controls in a mobile app. You can manually adjust exposure, ISO, light metering mode, focus, and white balance. The app also supports intervalometer for time-lapse photography, geotagging, and external microphone input. Camera FV-5 offers both free and paid versions, with the latter providing additional features like RAW capture and advanced editing tools.</p> <h3>4. Footej Camera</h3> <p>Footej Camera is a versatile camera app that combines simplicity and powerful features. It boasts manual controls for focus, ISO, shutter speed, and white balance. Furthermore, it offers 4K video recording, slow-motion capture, HDR+ mode, and a built-in photo editor. The app is free to download but includes in-app purchases for additional features like RAW support and no watermark.</p> <h3>5. Bacon Camera</h3> <p>Bacon Camera brings manual controls and a wide range of camera features to devices with limited native capabilities. It supports manual focus, ISO, shutter speed, and white balance adjustments. The app also offers RAW capture, panorama mode, HDR, and a histogram for better exposure control. Bacon Camera is free to download but contains advertisements and in-app purchases for certain features.</p> <h4>Conclusion</h4> <p>While GCam ports are popular for improving smartphone photography, they aren't the only option. Open Camera, Adobe Lightroom, Camera FV-5, Footej Camera, and Bacon Camera provide valuable alternatives with various features and customization options. Depending on your preferences and device compatibility, one of these apps may be the perfect choice for capturing stunning photos with your smartphone.</p>
<h2>Aplicaciones de cámara de alta calidad para tu smartphone</h2> <p>Google Camera (GCam) es conocida por producir fotos excelentes, pero solo está disponible oficialmente en los dispositivos Pixel. Sin embargo, la entusiasta comunidad de desarrolladores ha creado puertos de GCam que llevan muchas de sus funciones a otros smartphones Android. Pero, ¿qué pasa si no encuentras un puerto de GCam compatible o quieres probar algo diferente? Aquí tienes algunas alternativas destacadas:</p> <h3>1. Open Camera</h3> <p>Open Camera es una aplicación de cámara de código abierto que valora la simplicidad, la personalización y la privacidad. Ofrece controles manuales para ISO, velocidad de obturación, enfoque y balance de blancos. Además, incluye funciones como HDR, modo panorámico y soporte para micrófonos externos. Open Camera no contiene anuncios ni compras dentro de la aplicación, lo que la convierte en una gran opción si te preocupa la privacidad.</p> <h3>2. Adobe Lightroom</h3> <p>Aunque principalmente se conoce como una herramienta de edición fotográfica, Adobe Lightroom también ofrece una avanzada aplicación de cámara para dispositivos móviles. Permite capturar en RAW, ajustes manuales de exposición, ISO, velocidad de obturación y balance de blancos, así como varios preajustes y herramientas de edición de nivel profesional. La aplicación es gratuita para descargar, pero requiere una suscripción a Creative Cloud para ciertas funciones.</p> <h3>3. Camera FV-5</h3> <p>Camera FV-5 se centra en ofrecer controles similares a los de una DSLR en una aplicación móvil. Puedes ajustar manualmente la exposición, ISO, modo de medición de luz, enfoque y balance de blancos. La aplicación también admite intervalómetro para fotografía en time-lapse, geolocalización y entrada de micrófono externo. Camera FV-5 ofrece versiones gratuitas y de pago, siendo esta última la que proporciona funciones adicionales como captura en RAW y herramientas avanzadas de edición.</p> <h3>4. Footej Camera</h3> <p>Footej Camera es una aplicación de cámara versátil que combina simplicidad y funciones potentes. Presume de controles manuales para enfoque, ISO, velocidad de obturación y balance de blancos. Además, ofrece grabación de video en 4K, captura en cámara lenta, modo HDR+ y un editor de fotos integrado. La aplicación es gratuita para descargar, pero incluye compras dentro de la aplicación para funciones adicionales como soporte RAW y eliminación de marcas de agua.</p> <h3>5. Bacon Camera</h3> <p>Bacon Camera lleva controles manuales y una amplia gama de funciones de cámara a dispositivos con capacidades nativas limitadas. Admite ajustes manuales de enfoque, ISO, velocidad de obturación y balance de blancos. La aplicación también ofrece captura en RAW, modo panorámico, HDR y un histograma para un mejor control de la exposición. Bacon Camera es gratuita para descargar, pero contiene anuncios y compras dentro de la aplicación para ciertas funciones.</p> <h4>Conclusión</h4> <p>Aunque los puertos de GCam son populares para mejorar la fotografía en smartphones, no son la única opción. Open Camera, Adobe Lightroom, Camera FV-5, Footej Camera y Bacon Camera ofrecen valiosas alternativas con diversas funciones y opciones de personalización. Dependiendo de tus preferencias y la compatibilidad de tu dispositivo, una de estas aplicaciones puede ser la elección perfecta para capturar fotos impresionantes con tu smartphone.</p>
Practical advices to take better photos
Consejos prácticos para tomar mejores fotos
<p>Photography is a rewarding hobby that can be enjoyed by people of all ages and skill levels. With the right knowledge and equipment, you can take stunning photos that capture memories and moments in time. In this blog post, we will discuss some practical tips to help you improve your photography skills and take better photos.</p> <h3>1. Understand Your Camera</h3> <p>Before you start taking photos, it's important to understand how your camera works. Take some time to read the manual and learn about the different settings and features. Experiment with the various modes and settings to see how they affect your photos. This will help you become more comfortable with your camera and enable you to take better photos.</p> <h3>2. Use the Rule of Thirds</h3> <p>The rule of thirds is a fundamental principle of photography that involves dividing the frame into nine equal parts using two equally spaced horizontal lines and two equally spaced vertical lines. By placing your subject along one of these lines or at their intersection, you can create a more balanced and visually pleasing composition.</p> <h3>3. Adjust Your Shutter Speed</h3> <p>Shutter speed is the amount of time that the camera's shutter is open, allowing light to reach the sensor. By adjusting the shutter speed, you can control how motion is captured in your photos. Slow shutter speeds (less than 1/60th of a second) will create blur in moving objects, while fast shutter speeds (faster than 1/250th of a second) will freeze motion. Experiment with different shutter speeds to see how they affect your photos.</p> <h3>4. Control Your Aperture</h3> <p>Aperture is the size of the opening in the lens through which light enters the camera. By adjusting the aperture, you can control the depth of field in your photos. A large aperture (small f-number) will create a shallow depth of field, where the subject is in focus and the background is blurred. A small aperture (large f-number) will create a deep depth of field, where everything from the foreground to the background is in focus.</p> <h3>5. Use Natural Light</h3> <p>Natural light is often the best source of light for photography. When shooting outdoors, try to avoid direct sunlight and shoot in the shade or on overcast days. This will create soft, diffused light that is ideal for portraits and landscapes. When shooting indoors, make use of natural light by opening windows and doors to let in as much light as possible.</p> <h3>6. Experiment with Composition</h3> <p>Composition refers to the arrangement of elements within the frame. While the rule of thirds is a useful starting point, don't be afraid to experiment with different compositions to see what works best for your subject. Try shooting from different angles, perspectives, and distances to create unique and interesting photos.</p> <h3>7. Post-Process Your Photos</h3> <p>Post-processing is the process of editing and enhancing your photos using software such as Adobe Lightroom or Photoshop. By adjusting things like exposure, contrast, saturation, and sharpness, you can improve the overall quality of your photos and make them look their best. However, be careful not to overdo it, as excessive post-processing can make your photos look unnatural and artificial.</p> <h3>8. Practice, Practice, Practice</h3> <p>Like any skill, photography takes practice to master. Don't be discouraged if your early photos don't turn out the way you want them to. Keep practicing and experimenting with different techniques, and you will gradually see improvement. Join a local camera club or take a photography class to learn from other photographers and get feedback on your work.</p> <h4>Conclusion</h4> <p>Taking great photos requires more than just a good camera. By understanding your camera, using the rule of thirds, adjusting your shutter speed and aperture, using natural light, experimenting with composition, post-processing your photos, and practicing regularly, you can improve your photography skills and take better photos that capture memories and moments in time.</p>
<p>La fotografía es un pasatiempo gratificante que puede ser disfrutado por personas de todas las edades y niveles de habilidad. Con el conocimiento y el equipo adecuados, puedes tomar fotos impresionantes que capturen recuerdos y momentos en el tiempo. En esta entrada de blog, discutiremos algunos consejos prácticos para ayudarte a mejorar tus habilidades fotográficas y tomar mejores fotos.</p> <h3>1. Comprende tu cámara</h3> <p>Antes de comenzar a tomar fotos, es importante entender cómo funciona tu cámara. Dedica algo de tiempo a leer el manual y aprender sobre los diferentes ajustes y funciones. Experimenta con los distintos modos y configuraciones para ver cómo afectan tus fotos. Esto te ayudará a sentirte más cómodo con tu cámara y te permitirá tomar mejores fotografías.</p> <h3>2. Usa la regla de los tercios</h3> <p>La regla de los tercios es un principio fundamental de la fotografía que consiste en dividir el encuadre en nueve partes iguales utilizando dos líneas horizontales y dos líneas verticales espaciadas de manera uniforme. Al colocar tu sujeto a lo largo de una de estas líneas o en su intersección, puedes crear una composición más equilibrada y visualmente atractiva.</p> <h3>3. Ajusta la velocidad de obturación</h3> <p>La velocidad de obturación es el tiempo que el obturador de la cámara permanece abierto, permitiendo que la luz llegue al sensor. Al ajustar la velocidad de obturación, puedes controlar cómo se captura el movimiento en tus fotos. Velocidades lentas (menos de 1/60 de segundo) crearán desenfoque en objetos en movimiento, mientras que velocidades rápidas (más rápidas que 1/250 de segundo) congelarán el movimiento. Experimenta con diferentes velocidades de obturación para ver cómo afectan tus fotos.</p> <h3>4. Controla la apertura</h3> <p>La apertura es el tamaño de la abertura en el lente por la cual entra la luz a la cámara. Al ajustar la apertura, puedes controlar la profundidad de campo en tus fotos. Una apertura grande (número f pequeño) creará una profundidad de campo reducida, donde el sujeto está enfocado y el fondo aparece desenfocado. Una apertura pequeña (número f grande) creará una profundidad de campo amplia, donde todo, desde el primer plano hasta el fondo, estará enfocado.</p> <h3>5. Usa luz natural</h3> <p>La luz natural suele ser la mejor fuente de iluminación para la fotografía. Al tomar fotos al aire libre, trata de evitar la luz solar directa y dispara en la sombra o en días nublados. Esto creará una luz suave y difusa, ideal para retratos y paisajes. Al fotografiar en interiores, aprovecha la luz natural abriendo ventanas y puertas para dejar entrar la mayor cantidad de luz posible.</p> <h3>6. Experimenta con la composición</h3> <p>La composición se refiere a la disposición de los elementos dentro del encuadre. Aunque la regla de los tercios es un buen punto de partida, no tengas miedo de experimentar con diferentes composiciones para ver qué funciona mejor para tu sujeto. Intenta disparar desde distintos ángulos, perspectivas y distancias para crear fotos únicas e interesantes.</p> <h3>7. Postprocesa tus fotos</h3> <p>El postprocesamiento es el proceso de editar y mejorar tus fotos utilizando software como Adobe Lightroom o Photoshop. Al ajustar aspectos como la exposición, el contraste, la saturación y la nitidez, puedes mejorar la calidad general de tus imágenes y hacer que se vean lo mejor posible. Sin embargo, ten cuidado de no exagerar, ya que un postprocesamiento excesivo puede hacer que tus fotos se vean poco naturales y artificiales.</p> <h3>8. Practica, practica, practica</h3> <p>Como cualquier habilidad, la fotografía requiere práctica para dominarla. No te desanimes si tus primeras fotos no resultan como esperabas. Sigue practicando y experimentando con diferentes técnicas, y gradualmente verás mejoras. Únete a un club de fotografía local o toma una clase de fotografía para aprender de otros fotógrafos y recibir retroalimentación sobre tu trabajo.</p> <h4>Conclusión</h4> <p>Tomar excelentes fotos requiere más que solo una buena cámara. Al comprender tu cámara, usar la regla de los tercios, ajustar la velocidad de obturación y la apertura, aprovechar la luz natural, experimentar con la composición, postprocesar tus fotos y practicar regularmente, puedes mejorar tus habilidades fotográficas y capturar mejores imágenes que conserven recuerdos y momentos en el tiempo.</p>
What is GCam?
¿Qué es GCam?
<p>GCam, short for Google Camera, is the camera app that comes pre-installed on Google's Pixel devices. The app has gained a reputation for producing high-quality photos, even in low-light conditions, thanks to its advanced image processing algorithms and features such as Night Sight and Astrophotography mode.</p> <h3>Advanced Image Processing</h3> <p>One of the key features that sets GCam apart from other camera apps is its ability to capture and process images using advanced algorithms. This allows the app to produce photos with a high level of detail, accurate colors, and reduced noise – even in challenging lighting conditions.</p> <p>GCam uses several techniques to achieve this, including HDR+ (High Dynamic Range), which captures multiple images at different exposure levels and combines them into a single image. This allows the app to capture more detail in both the shadows and highlights of an image.</p> <p>Another technique used by GCam is software-based image stabilization, which helps to reduce camera shake and blur when taking photos or videos. This feature is especially useful when shooting handheld, as it can help to produce sharper images with less motion blur.</p> <h3>Unique Features</h3> <p>GCam also includes several unique features that are not found in other camera apps. One of the most popular is Night Sight, which allows users to take bright and clear photos in low-light conditions without the need for a flash.</p> <p>Night Sight uses machine learning algorithms to analyze the available light and adjust the camera settings accordingly. This allows the app to capture more detail and reduce noise in dark environments, resulting in better quality images than would be possible with traditional camera apps.</p> <p>Another unique feature of GCam is Astrophotography mode, which allows users to take stunning photos of the night sky. This feature uses a combination of long exposure times, image stacking, and advanced noise reduction algorithms to capture detailed images of stars, galaxies, and other celestial objects.</p> <h3>Compatibility and Availability</h3> <p>While GCam is designed to work specifically with Google's Pixel devices, there are several ways to get the app working on other Android devices. One method is to sideload the app, which involves downloading the APK file from a trusted source and installing it manually.</p> <p>However, it's important to note that not all devices will be compatible with GCam, and some features may not work as intended. It's also worth noting that sideloading apps can pose security risks if done improperly, so it's recommended to only download APK files from trusted sources like GCamator.</p> <p>In summary, GCam is a powerful camera app that uses advanced image processing algorithms and unique features to capture high-quality photos – even in low-light conditions. While the app is designed specifically for Google's Pixel devices, it can be installed on other Android devices using third-party APK files. However, compatibility and functionality may vary depending on the device and version of Android being used.</p>
<p>GCam, abreviatura de Google Camera, es la aplicación de cámara que viene preinstalada en los dispositivos Pixel de Google. La aplicación ha ganado una gran reputación por producir fotos de alta calidad, incluso en condiciones de poca luz, gracias a sus avanzados algoritmos de procesamiento de imágenes y funciones como Night Sight y el modo de Astrofotografía.</p> <h3>Procesamiento avanzado de imágenes</h3> <p>Una de las características clave que diferencia a GCam de otras aplicaciones de cámara es su capacidad para capturar y procesar imágenes utilizando algoritmos avanzados. Esto permite que la aplicación produzca fotos con un alto nivel de detalle, colores precisos y menos ruido, incluso en condiciones de iluminación difíciles.</p> <p>GCam utiliza varias técnicas para lograr esto, incluyendo HDR+ (High Dynamic Range), que captura múltiples imágenes con diferentes niveles de exposición y las combina en una sola imagen. Esto permite a la aplicación capturar más detalle tanto en las sombras como en las luces de una fotografía.</p> <p>Otra técnica utilizada por GCam es la estabilización de imagen basada en software, que ayuda a reducir el movimiento de la cámara y el desenfoque al tomar fotos o videos. Esta función es especialmente útil al disparar sin trípode, ya que ayuda a producir imágenes más nítidas con menos desenfoque por movimiento.</p> <h3>Funciones únicas</h3> <p>GCam también incluye varias funciones únicas que no se encuentran en otras aplicaciones de cámara. Una de las más populares es Night Sight, que permite a los usuarios tomar fotos brillantes y claras en condiciones de poca luz sin necesidad de usar flash.</p> <p>Night Sight utiliza algoritmos de aprendizaje automático para analizar la luz disponible y ajustar la configuración de la cámara en consecuencia. Esto permite a la aplicación capturar más detalle y reducir el ruido en entornos oscuros, dando como resultado imágenes de mejor calidad que las que serían posibles con aplicaciones de cámara tradicionales.</p> <p>Otra función única de GCam es el modo de Astrofotografía, que permite a los usuarios tomar impresionantes fotos del cielo nocturno. Esta función utiliza una combinación de tiempos de exposición prolongados, apilamiento de imágenes y algoritmos avanzados de reducción de ruido para capturar imágenes detalladas de estrellas, galaxias y otros objetos celestes.</p> <h3>Compatibilidad y disponibilidad</h3> <p>Aunque GCam está diseñada para funcionar específicamente con los dispositivos Pixel de Google, existen varias formas de hacer que la aplicación funcione en otros dispositivos Android. Un método es instalar la aplicación manualmente (sideload), lo que implica descargar el archivo APK desde una fuente confiable e instalarlo de forma manual.</p> <p>Sin embargo, es importante tener en cuenta que no todos los dispositivos serán compatibles con GCam y algunas funciones pueden no funcionar como se espera. También vale la pena señalar que instalar aplicaciones manualmente puede representar riesgos de seguridad si se hace de manera incorrecta, por lo que se recomienda descargar archivos APK únicamente de fuentes confiables como GCamator.</p> <p>En resumen, GCam es una potente aplicación de cámara que utiliza algoritmos avanzados de procesamiento de imágenes y funciones únicas para capturar fotos de alta calidad, incluso en condiciones de poca luz. Aunque la aplicación está diseñada específicamente para los dispositivos Pixel de Google, puede instalarse en otros dispositivos Android mediante archivos APK de terceros. Sin embargo, la compatibilidad y funcionalidad pueden variar según el dispositivo y la versión de Android utilizada.</p>
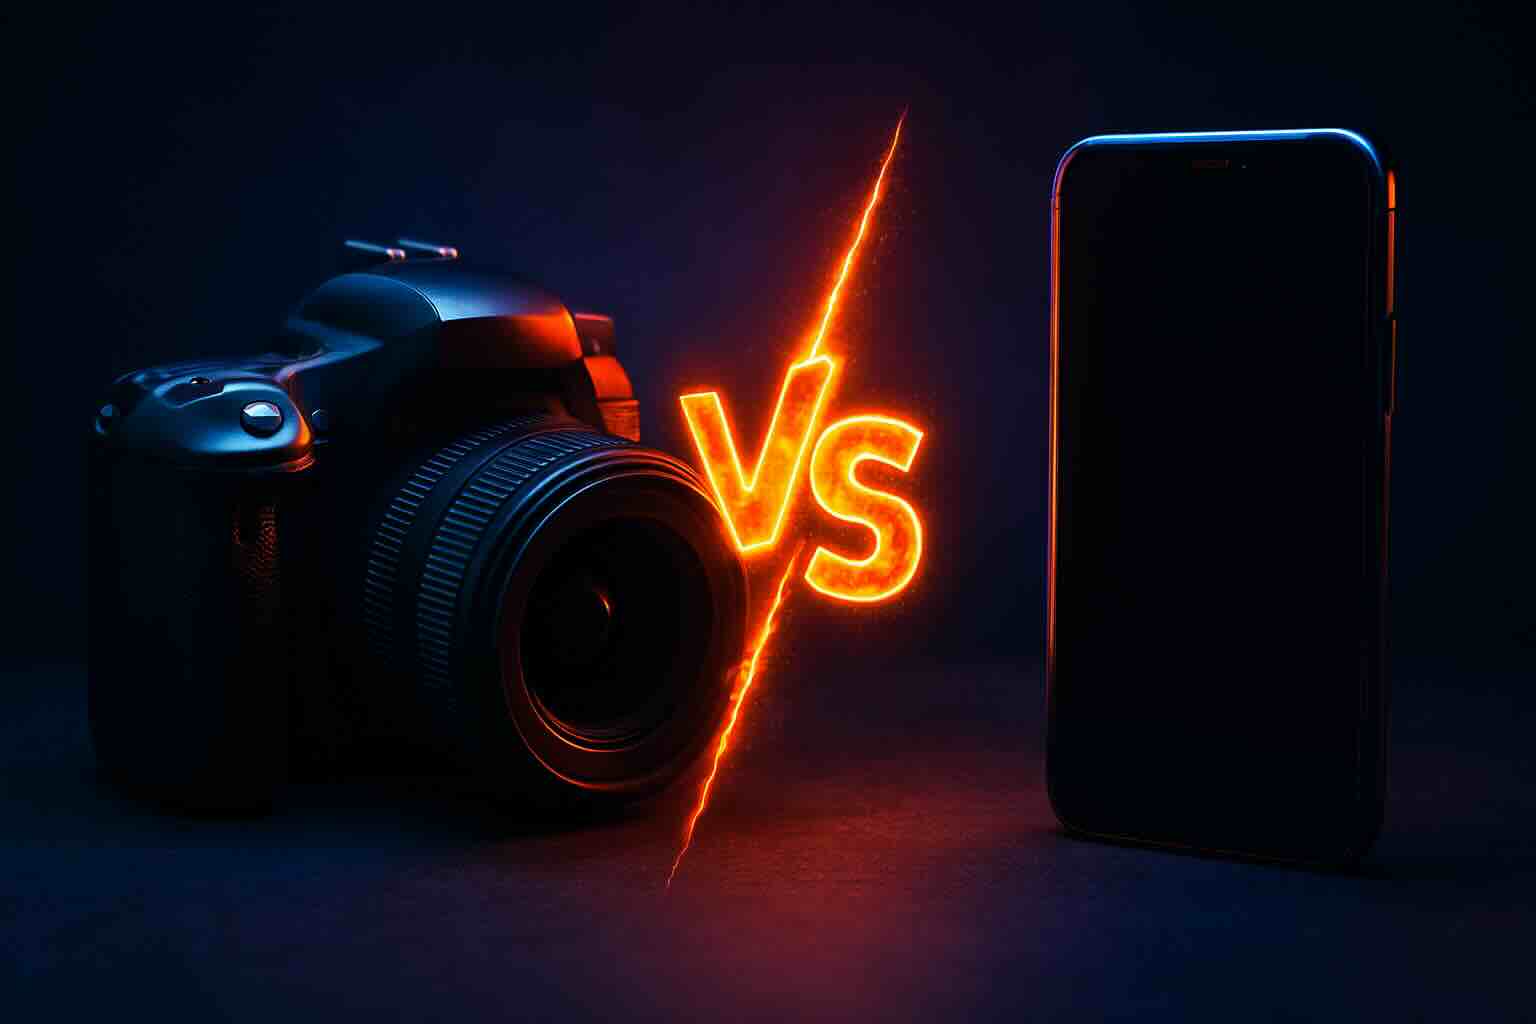
Why does 12MP DSLR take much better photos than 200MP smartphones?
¿Por qué una DSLR de 12MP toma fotos mucho mejores que un smartphone de 200MP?
<p>With the rapid advancements in mobile technology, it's no surprise that smartphones now boast cameras with impressive specifications. Some models even surpass the megapixel count of professional-grade DSLR cameras. However, a 200MP smartphone camera still can't match the photo quality produced by a 12MP DSLR.</p> <h3>Megapixels Aren't Everything</h3> <p>When comparing camera specifications, many people focus solely on megapixel count. However, this is only one factor in determining the overall photo quality. The size and quality of the sensor are just as important, if not more so. DSLRs have larger sensors than smartphones, allowing them to capture more light, resulting in better image quality.</p> <h3>Larger Sensor Size</h3> <p>The sensor in a 12MP DSLR is much larger than the one found in a 200MP smartphone. This size difference impacts how well each camera performs in low-light situations and their ability to produce sharp, detailed images. A larger sensor allows for better light gathering capabilities, resulting in less noise and higher dynamic range.</p> <h3>Interchangeable Lenses</h3> <p>One of the most significant advantages of DSLR cameras is their interchangeable lenses. High-quality DSLR lenses are designed to capture light efficiently, providing excellent sharpness and detail. This versatility allows photographers to use different lenses tailored for specific situations, such as low light or zooming in on distant subjects.</p> <h3>Image Processing</h3> <p>While smartphone cameras have become more advanced, they still can't compete with the image processing capabilities of DSLRs. High-end DSLR cameras feature powerful processors that can handle complex computations required to produce high-quality images. This, combined with their larger sensors and interchangeable lenses, ensures that DSLRs will continue producing better photos than smartphones for the foreseeable future.</p> <h3>Conclusion</h3> <p>While it may be tempting to assume that a 200MP smartphone camera would outperform a 12MP DSLR, this is not necessarily the case. The larger sensor size, interchangeable lenses, and powerful image processing capabilities of DSLR cameras ensure they can capture higher-quality images in various lighting conditions. So while smartphones continue to close the gap in terms of camera specifications, professional photographers will still rely on their trusty DSLRs for stunning, high-quality photos.</p>
<p>Con los rápidos avances en la tecnología móvil, no es sorprendente que los teléfonos inteligentes ahora presuman de cámaras con especificaciones impresionantes. Algunos modelos incluso superan el conteo de megapíxeles de cámaras DSLR de nivel profesional. Sin embargo, una cámara de smartphone de 200MP aún no puede igualar la calidad de las fotos producidas por una DSLR de 12MP.</p> <h3>Los megapíxeles no lo son todo</h3> <p>Al comparar las especificaciones de las cámaras, muchas personas se enfocan únicamente en el conteo de megapíxeles. Sin embargo, este es solo un factor para determinar la calidad general de la foto. El tamaño y la calidad del sensor son igual de importantes, si no más. Las DSLR tienen sensores más grandes que los smartphones, lo que les permite capturar más luz y, en consecuencia, producir una mejor calidad de imagen.</p> <h3>Tamaño de sensor más grande</h3> <p>El sensor en una DSLR de 12MP es mucho más grande que el que se encuentra en un smartphone de 200MP. Esta diferencia de tamaño impacta en el rendimiento de cada cámara en situaciones de poca luz y en su capacidad para producir imágenes nítidas y detalladas. Un sensor más grande permite una mejor captación de luz, lo que resulta en menos ruido y un mayor rango dinámico.</p> <h3>Lentes intercambiables</h3> <p>Una de las ventajas más significativas de las cámaras DSLR es la posibilidad de usar lentes intercambiables. Las lentes de alta calidad para DSLR están diseñadas para capturar la luz de manera eficiente, proporcionando una excelente nitidez y detalle. Esta versatilidad permite a los fotógrafos utilizar diferentes lentes adaptadas a situaciones específicas, como poca luz o zoom en sujetos distantes.</p> <h3>Procesamiento de imagen</h3> <p>Aunque las cámaras de los smartphones se han vuelto más avanzadas, aún no pueden competir con las capacidades de procesamiento de imagen de las DSLR. Las cámaras DSLR de gama alta cuentan con potentes procesadores capaces de manejar cálculos complejos necesarios para producir imágenes de alta calidad. Esto, combinado con sus sensores más grandes y lentes intercambiables, asegura que las DSLR continúen produciendo mejores fotos que los smartphones en el futuro previsible.</p> <h3>Conclusión</h3> <p>Aunque puede ser tentador asumir que una cámara de smartphone de 200MP superaría a una DSLR de 12MP, esto no es necesariamente cierto. El mayor tamaño del sensor, las lentes intercambiables y las potentes capacidades de procesamiento de imagen de las cámaras DSLR garantizan que puedan capturar imágenes de mayor calidad en diversas condiciones de iluminación. Así que, aunque los smartphones continúan cerrando la brecha en términos de especificaciones de cámara, los fotógrafos profesionales seguirán confiando en sus fieles DSLR para obtener fotos impresionantes y de alta calidad.</p>
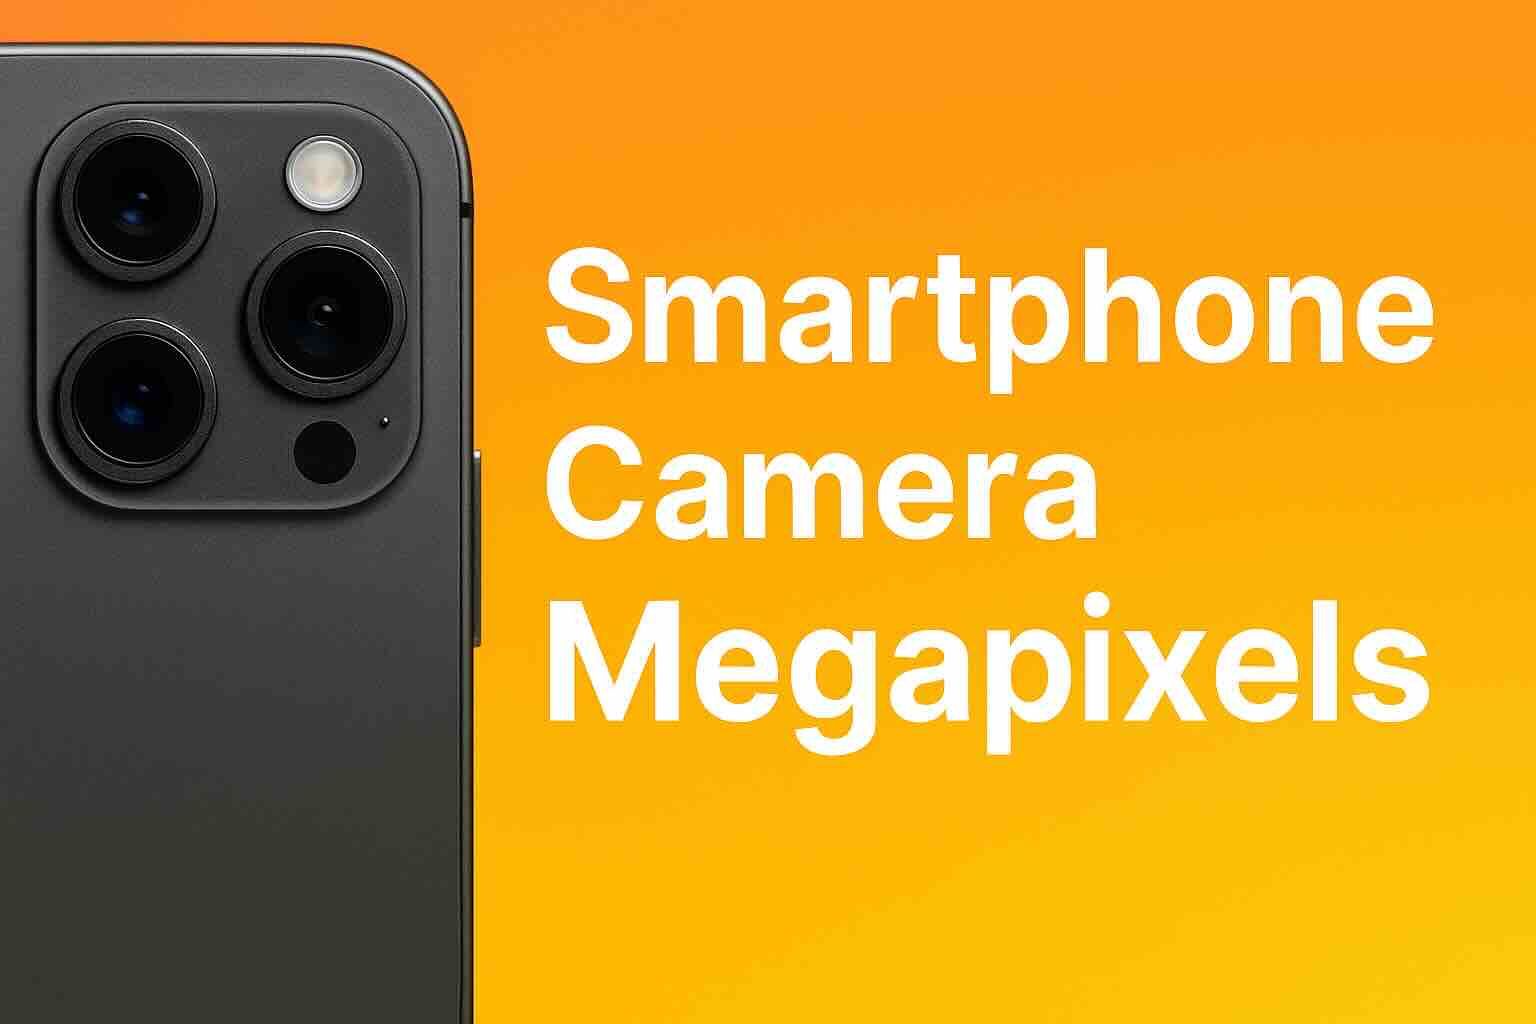
Why isn't Megapixel that important?
¿Por qué el megapíxel no es tan importante?
<p>When it comes to buying a new camera or smartphone, one of the most common specifications consumers look at is the number of megapixels the device boasts. It’s easy to understand why – more megapixels generally means higher resolution images and larger prints. However, there are many other factors that contribute to image quality, making the obsession with megapixel count somewhat misguided.</p> <h3>What is a Megapixel?</h3> <p>Firstly, let’s define what we mean by a “megapixel”. A megapixel (MP) is one million pixels, and in the context of cameras, it refers to the number of pixels that make up an image. For example, if a camera captures images at 2000 x 1500 resolution, this equates to 3 megapixels (since 2000 x 1500 = 3,000,000).</p> <h3>Why More Megapixels Isn’t Always Better</h3> <p>While more megapixels can be beneficial in certain scenarios – such as producing larger prints or cropping photos without losing detail – there are diminishing returns after a certain threshold. Beyond this point, other factors become much more important for overall image quality.</p> <ul> <li><strong>Sensor Size:</strong> The size of the sensor also plays a significant role in image quality. Larger sensors can capture more light and detail, resulting in better dynamic range, lower noise, and higher color accuracy. A high megapixel count on a small sensor won’t be able to compete with fewer megapixels on a larger sensor.</li> <li><strong>Lens Quality:</strong> The quality of the lens used can also have a greater impact on image quality than the megapixel count. A high-quality lens will produce sharper images with better contrast and color accuracy, regardless of the megapixel count.</li> <li><strong>Processing Power:</strong> More megapixels mean larger files sizes, which can put a strain on the device’s processing power. This can lead to slower performance, especially when editing or viewing photos.</li> </ul> <h3>How Many Megapixels Do You Need?</h3> <p>For most users, anything above 12-16 megapixels should be sufficient for taking high-quality photos. This is enough resolution to print images up to around 11x14 inches at 300dpi (dots per inch) – the standard recommendation for photo prints.</p> <p>Of course, there are exceptions. If you plan on creating large prints or cropping heavily, then a higher megapixel count may be beneficial. However, it’s important to consider the other factors mentioned above as well.</p> <h3>Conclusion</h3> <p>While megapixel count is an easy specification to compare when shopping for cameras or smartphones, it shouldn’t be the sole factor in your decision-making process. Sensor size, lens quality, and processing power all play crucial roles in image quality, and often have a greater impact than the number of pixels alone.</p> <p>So next time you’re looking to buy a new device with camera capabilities, don’t just focus on the megapixel count. Take a closer look at these other important factors to ensure you’re getting the best overall image quality for your needs.</p>
<p>Cuando se trata de comprar una nueva cámara o un teléfono inteligente, una de las especificaciones más comunes que los consumidores observan es la cantidad de megapíxeles que presume el dispositivo. Es fácil entender por qué: más megapíxeles generalmente significa imágenes de mayor resolución e impresiones más grandes. Sin embargo, existen muchos otros factores que contribuyen a la calidad de la imagen, lo que hace que la obsesión con el conteo de megapíxeles sea algo equivocada.</p> <h3>¿Qué es un Megapíxel?</h3> <p>Primero, definamos qué entendemos por “megapíxel”. Un megapíxel (MP) equivale a un millón de píxeles y, en el contexto de las cámaras, se refiere al número de píxeles que componen una imagen. Por ejemplo, si una cámara captura imágenes con una resolución de 2000 x 1500, esto equivale a 3 megapíxeles (ya que 2000 x 1500 = 3,000,000).</p> <h3>¿Por qué más megapíxeles no siempre es mejor?</h3> <p>Aunque más megapíxeles pueden ser beneficiosos en ciertos escenarios —como producir impresiones más grandes o recortar fotos sin perder detalle—, existen rendimientos decrecientes después de cierto umbral. Más allá de ese punto, otros factores se vuelven mucho más importantes para la calidad general de la imagen.</p> <ul> <li><strong>Tamaño del sensor:</strong> El tamaño del sensor también juega un papel significativo en la calidad de la imagen. Los sensores más grandes pueden capturar más luz y detalle, lo que resulta en un mejor rango dinámico, menor ruido y mayor precisión en los colores. Un alto conteo de megapíxeles en un sensor pequeño no podrá competir con menos megapíxeles en un sensor más grande.</li> <li><strong>Calidad de la lente:</strong> La calidad de la lente utilizada también puede tener un mayor impacto en la calidad de la imagen que el conteo de megapíxeles. Una lente de alta calidad producirá imágenes más nítidas, con mejor contraste y precisión de color, independientemente del número de megapíxeles.</li> <li><strong>Poder de procesamiento:</strong> Más megapíxeles significan archivos de mayor tamaño, lo que puede poner presión en la capacidad de procesamiento del dispositivo. Esto puede llevar a un rendimiento más lento, especialmente al editar o visualizar fotos.</li> </ul> <h3>¿Cuántos megapíxeles necesitas?</h3> <p>Para la mayoría de los usuarios, cualquier cosa por encima de 12-16 megapíxeles debería ser suficiente para tomar fotos de alta calidad. Esta resolución es suficiente para imprimir imágenes de hasta aproximadamente 28x35 cm (11x14 pulgadas) a 300 dpi (puntos por pulgada), la recomendación estándar para impresiones fotográficas.</p> <p>Por supuesto, hay excepciones. Si planeas crear impresiones grandes o recortar mucho las fotos, entonces un conteo más alto de megapíxeles puede ser beneficioso. Sin embargo, también es importante considerar los otros factores mencionados anteriormente.</p> <h3>Conclusión</h3> <p>Aunque el conteo de megapíxeles es una especificación fácil de comparar al comprar cámaras o teléfonos inteligentes, no debería ser el único factor en tu proceso de decisión. El tamaño del sensor, la calidad de la lente y el poder de procesamiento juegan roles cruciales en la calidad de la imagen, y a menudo tienen un mayor impacto que el número de píxeles por sí solo.</p> <p>Así que la próxima vez que busques comprar un nuevo dispositivo con capacidades de cámara, no te enfoques únicamente en el conteo de megapíxeles. Observa más de cerca estos otros factores importantes para asegurarte de obtener la mejor calidad de imagen general para tus necesidades.</p>

GCams changelog history from 5.x till 8.4
Historial de cambios de GCam desde la versión 5.x hasta la 8.4
<p>GCams, also known as Google Camera ports, have come a long way since their inception. Developers have been working hard to bring the Pixel camera experience to other devices, and the changelogs for each version show just how much effort has gone into this project. In this article, we'll take a look at the major changes and improvements made in GCams versions 5.x to 8.4.</p> <h3>GCams 5.x</h3> <p>The 5.x series of GCams saw several significant updates that brought new features and improved performance. Here are some of the highlights:</p> <ul> <li><strong>Auxiliary camera support:</strong> This feature allowed users to access additional cameras on their devices, such as telephoto or monochrome sensors.</li> <li><strong>Slo-mo video recording:</strong> Users could now record slow-motion videos at up to 240fps, depending on the device's capabilities.</li> <li><strong>HDR+ enhanced mode:</strong> This improved HDR mode provided better low-light performance and reduced noise in images.</li> <li><strong>Video stabilization:</strong> The introduction of video stabilization helped to reduce shaky footage when recording videos.</li> </ul> <h3>GCams 6.x</h3> <p>The 6.x series of GCams introduced several new features and improvements, including:</p> <ul> <li><strong>Night Sight mode:</strong> This feature allowed users to capture detailed images in low-light conditions using AI-powered image processing.</li> <li><strong>Portrait mode:</strong> The addition of portrait mode enabled users to take photos with a blurred background effect, also known as bokeh.</li> <li><strong>Motion photos:</strong> Similar to Apple's Live Photos, this feature captured a short video clip along with the still image.</li> </ul> <h3>GCams 7.x</h3> <p>The 7.x series of GCams introduced several new features and improvements, such as:</p> <ul> <li><strong>Astrophotography mode:</strong> This feature allowed users to capture images of the night sky using a tripod and long exposure times.</li> <li><strong>Photosphere:</strong> This feature enabled users to create 360-degree panoramic photos by stitching together multiple shots.</li> <li><strong>Focus slider:</strong> The focus slider allowed users to manually adjust the focus of their camera for more precise control.</li> </ul> <h3>GCams 8.x</h3> <p>The latest version of GCams, 8.x, introduced several new features and improvements, such as:</p> <ul> <li><strong>Sabre:</strong> This feature improved the dynamic range of images captured in low-light conditions.</li> <li><strong>Liberty:</strong> This feature optimized image processing for certain devices, resulting in better performance and image quality.</li> <li><strong>Smartburst:</strong> Similar to Apple's Burst mode, this feature captured a rapid sequence of photos with a single press of the shutter button.</li> </ul> <p>In conclusion, GCams has come a long way since its early versions. With each new release, developers have added new features and improved performance to bring the Pixel camera experience to more devices. From auxiliary camera support in 5.x to Astrophotography mode in 7.x and Sabre in 8.x, GCams continues to push the boundaries of mobile photography.</p>
<p>GCams, también conocidos como puertos de Google Camera, han recorrido un largo camino desde su creación. Los desarrolladores han trabajado arduamente para llevar la experiencia de la cámara Pixel a otros dispositivos, y los registros de cambios de cada versión muestran cuánto esfuerzo se ha invertido en este proyecto. En este artículo, veremos los principales cambios y mejoras realizados en las versiones de GCams desde la 5.x hasta la 8.4.</p> <h3>GCams 5.x</h3> <p>La serie 5.x de GCams tuvo varias actualizaciones significativas que trajeron nuevas funciones y mejoraron el rendimiento. Aquí algunos de los aspectos destacados:</p> <ul> <li><strong>Soporte para cámaras auxiliares:</strong> Esta función permitió a los usuarios acceder a cámaras adicionales en sus dispositivos, como sensores telefoto o monocromáticos.</li> <li><strong>Grabación de video en cámara lenta:</strong> Los usuarios podían grabar videos en cámara lenta de hasta 240fps, dependiendo de las capacidades del dispositivo.</li> <li><strong>Modo HDR+ mejorado:</strong> Este modo HDR mejorado ofrecía un mejor rendimiento en condiciones de poca luz y reducía el ruido en las imágenes.</li> <li><strong>Estabilización de video:</strong> La introducción de la estabilización de video ayudó a reducir las tomas temblorosas al grabar videos.</li> </ul> <h3>GCams 6.x</h3> <p>La serie 6.x de GCams introdujo varias funciones y mejoras nuevas, incluyendo:</p> <ul> <li><strong>Modo Night Sight:</strong> Esta función permitió a los usuarios capturar imágenes detalladas en condiciones de poca luz utilizando procesamiento de imágenes impulsado por IA.</li> <li><strong>Modo Retrato:</strong> La incorporación del modo retrato permitió a los usuarios tomar fotos con un efecto de fondo desenfocado, también conocido como bokeh.</li> <li><strong>Fotos en movimiento:</strong> Similar a las Live Photos de Apple, esta función capturaba un breve videoclip junto con la imagen fija.</li> </ul> <h3>GCams 7.x</h3> <p>La serie 7.x de GCams introdujo varias funciones y mejoras nuevas, tales como:</p> <ul> <li><strong>Modo Astrofotografía:</strong> Esta función permitió a los usuarios capturar imágenes del cielo nocturno utilizando un trípode y tiempos de exposición prolongados.</li> <li><strong>Photosphere:</strong> Esta función permitía a los usuarios crear fotos panorámicas de 360 grados uniendo múltiples tomas.</li> <li><strong>Control deslizante de enfoque:</strong> El control deslizante de enfoque permitía a los usuarios ajustar manualmente el enfoque de su cámara para un control más preciso.</li> </ul> <h3>GCams 8.x</h3> <p>La última versión de GCams, la 8.x, introdujo varias funciones y mejoras nuevas, tales como:</p> <ul> <li><strong>Sabre:</strong> Esta función mejoró el rango dinámico de las imágenes capturadas en condiciones de poca luz.</li> <li><strong>Liberty:</strong> Esta función optimizó el procesamiento de imágenes para ciertos dispositivos, resultando en un mejor rendimiento y calidad de imagen.</li> <li><strong>Smartburst:</strong> Similar al modo ráfaga de Apple, esta función capturaba una secuencia rápida de fotos con una sola pulsación del botón de disparo.</li> </ul> <p>En conclusión, GCams ha recorrido un largo camino desde sus primeras versiones. Con cada nuevo lanzamiento, los desarrolladores han añadido nuevas funciones y mejorado el rendimiento para llevar la experiencia de la cámara Pixel a más dispositivos. Desde el soporte para cámaras auxiliares en la 5.x hasta el modo Astrofotografía en la 7.x y Sabre en la 8.x, GCams continúa ampliando los límites de la fotografía móvil.</p>

5 Unknown facts about Android
5 datos desconocidos sobre Android
Android, the popular mobile operating system developed by Google, has been a game-changer in the world of smartphones. Since its release in 2008, Android has become the most widely used mobile platform in the world, with billions of users across the globe. Despite its widespread popularity, there are still some unknown facts about Android that many people are not aware of. In this blog post, we will explore five such unknown facts about Android. 1. Android was almost called "Android Dumpling" Before Google finally decided to name the mobile operating system Android, they had a few other names in mind, one of which was "Android Dumpling." The name was inspired by the project's mascot, which was designed to look like a robot eating a dumpling. However, Google eventually settled on the name Android, and the rest is history. 2. Android is open-source One of the lesser-known facts about Android is that it is an open-source operating system. This means that anyone can access the source code of the operating system and modify it to their liking. Google releases the source code of Android under the Apache license, which allows developers to use, modify, and distribute the code as they see fit. This has led to the development of countless custom ROMs and modifications for Android devices, giving users more control over their devices than they would have with a closed-source operating system. 3. Android was originally designed for cameras When Android was first developed by Andy Rubin and his team at Android Inc., it was not intended for use on smartphones. Instead, the operating system was designed to be used on digital cameras. However, when Google acquired Android Inc. in 2005, they saw the potential of the operating system as a platform for mobile devices and pivoted its development towards smartphones. 4. Every Android version’s codename (before Android 10) followed dessert names in alphabetical order — but internally, Google still uses dessert codenames even after they stopped making them public. For example: Android 10 was internally called “Quince Tart.” Android 11 → “Red Velvet Cake.” Android 12 → “Snow Cone.” Android 13 → “Tiramisu.” Even though Google stopped marketing Android versions with dessert names after Pie (Android 9), the internal tradition never died — engineers at Google still use those names in code and development builds. 🍰 5. Android's logo was inspired by the Robot Montauk character from The Day the Earth Stood Still The iconic robot logo of Android was inspired by the Robot Montauk character from the 1951 science fiction film The Day the Earth Stood Still. The designer of the logo, Irina Blok, drew inspiration from the movie's poster and the robot's distinctive shape to create the now-familiar Android logo. In conclusion, Android is a fascinating operating system with a rich history and many unknown facts. From its humble beginnings as a camera operating system to its current status as the most widely used mobile platform in the world, Android has come a long way since its release in 2008. Whether you're a seasoned Android user or just discovering the platform, there's always something new to learn about this incredible operating system.
<p>Android, el popular sistema operativo móvil desarrollado por Google, ha sido un cambio radical en el mundo de los teléfonos inteligentes. Desde su lanzamiento en 2008, Android se ha convertido en la plataforma móvil más utilizada en el mundo, con miles de millones de usuarios en todo el planeta. A pesar de su gran popularidad, todavía existen algunos datos desconocidos sobre Android de los que muchas personas no están al tanto. En esta entrada de blog, exploraremos cinco de esos datos desconocidos sobre Android.</p> <h3>1. Android casi se llamó "Android Dumpling"</h3> <p>Antes de que Google decidiera finalmente nombrar al sistema operativo móvil como Android, tenían en mente algunos otros nombres, uno de los cuales era "Android Dumpling". El nombre se inspiraba en la mascota del proyecto, que fue diseñada para parecer un robot comiendo una empanadilla. Sin embargo, Google finalmente se decidió por el nombre Android, y el resto es historia.</p> <h3>2. Android es de código abierto</h3> <p>Uno de los hechos menos conocidos sobre Android es que es un sistema operativo de código abierto. Esto significa que cualquiera puede acceder al código fuente del sistema operativo y modificarlo a su gusto. Google publica el código fuente de Android bajo la licencia Apache, lo que permite a los desarrolladores usar, modificar y distribuir el código como lo consideren conveniente. Esto ha llevado al desarrollo de innumerables ROMs personalizadas y modificaciones para dispositivos Android, dando a los usuarios más control sobre sus dispositivos que con un sistema operativo de código cerrado.</p> <h3>3. Android fue diseñado originalmente para cámaras</h3> <p>Cuando Android fue desarrollado por primera vez por Andy Rubin y su equipo en Android Inc., no estaba destinado a usarse en teléfonos inteligentes. En cambio, el sistema operativo fue diseñado para ser utilizado en cámaras digitales. Sin embargo, cuando Google adquirió Android Inc. en 2005, vieron el potencial del sistema operativo como una plataforma para dispositivos móviles y orientaron su desarrollo hacia los smartphones.</p> <h3>4. El nombre en clave de cada versión de Android (antes de Android 10) seguía nombres de postres en orden alfabético — pero internamente, Google aún usa nombres de postres incluso después de dejar de hacerlos públicos.</h3> <p>Por ejemplo:</p> <ul> <li>Android 10 fue llamado internamente “Quince Tart”.</li> <li>Android 11 → “Red Velvet Cake”.</li> <li>Android 12 → “Snow Cone”.</li> <li>Android 13 → “Tiramisu”.</li> </ul> <p>Aunque Google dejó de comercializar las versiones de Android con nombres de postres después de Pie (Android 9), la tradición interna nunca murió — los ingenieros de Google aún usan esos nombres en el código y en las versiones de desarrollo. 🍰</p> <h3>5. El logo de Android se inspiró en el personaje Robot Montauk de la película The Day the Earth Stood Still</h3> <p>El icónico logo de Android se inspiró en el personaje Robot Montauk de la película de ciencia ficción de 1951 *The Day the Earth Stood Still*. La diseñadora del logo, Irina Blok, tomó inspiración del póster de la película y de la forma distintiva del robot para crear el ahora familiar logo de Android.</p> <h3>Conclusión</h3> <p>Android es un sistema operativo fascinante con una rica historia y muchos datos desconocidos. Desde sus humildes comienzos como un sistema operativo para cámaras hasta su estatus actual como la plataforma móvil más utilizada en el mundo, Android ha recorrido un largo camino desde su lanzamiento en 2008. Ya seas un usuario experimentado de Android o estés descubriendo la plataforma por primera vez, siempre hay algo nuevo que aprender sobre este increíble sistema operativo.</p>
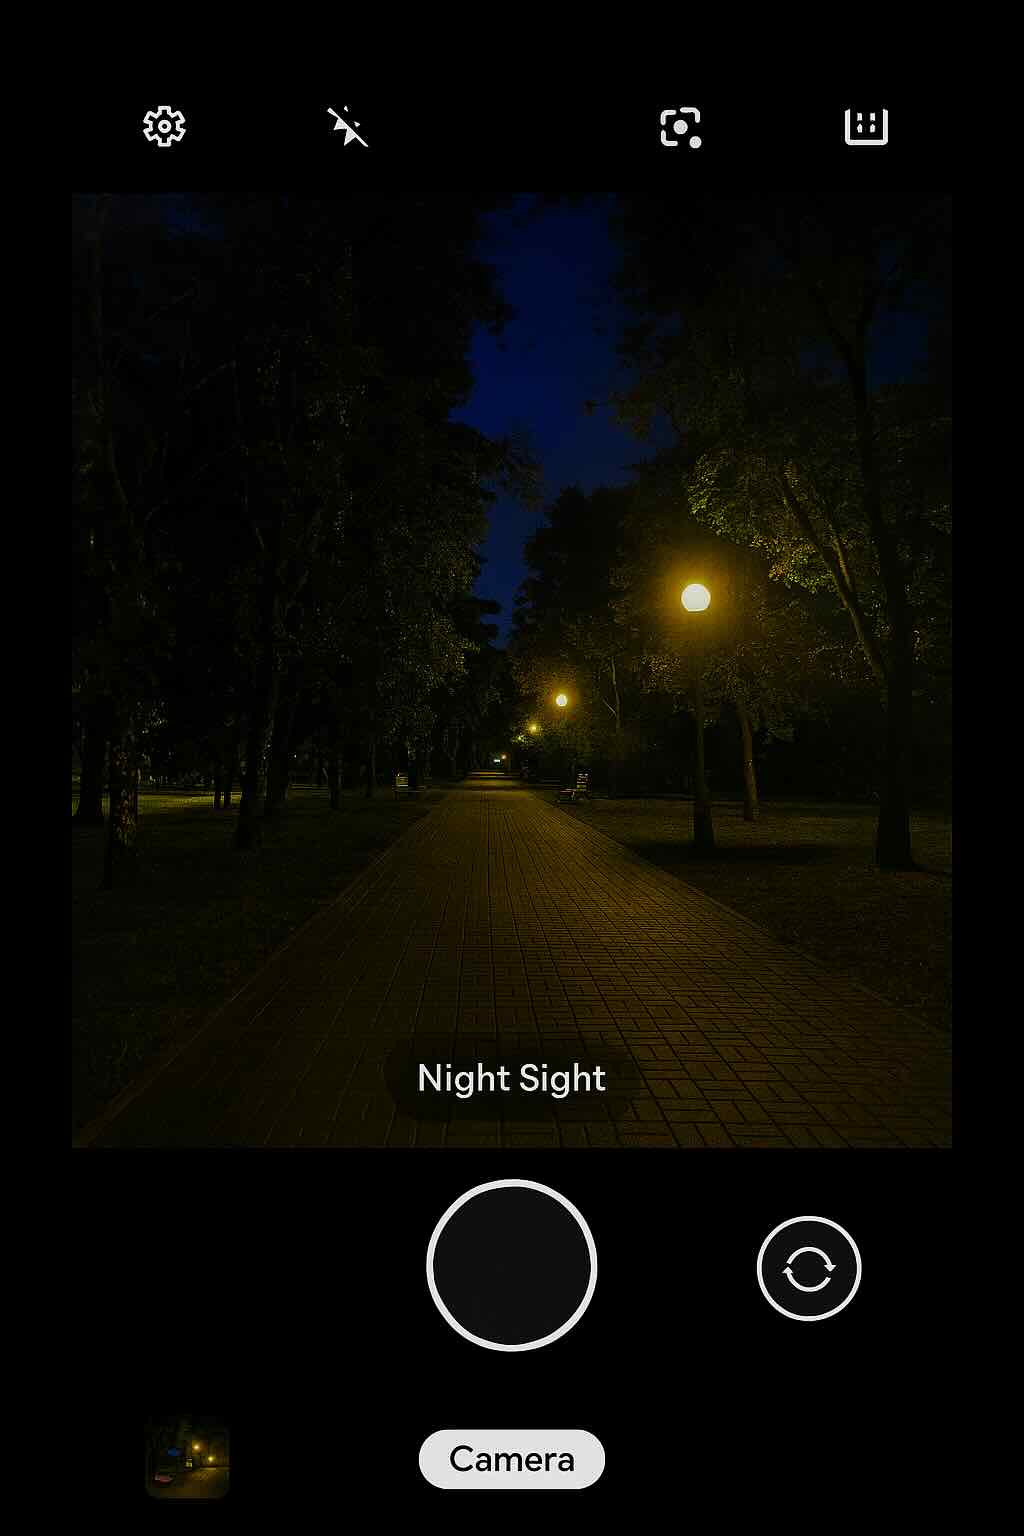
How does GCam Night Sight work? (Deep Explanation)
¿Cómo funciona GCam Night Sight? (Explicación profunda)
<p>If you're a photography enthusiast or even just a casual smartphone user, you've probably heard of Google Camera (GCam) and its much-talked-about Night Sight mode. This feature has revolutionized low-light photography on mobile devices, making it possible to take stunning images in dark environments without the need for a flash. But how does GCam Night Sight work exactly? Let's dive into the technical details behind this impressive technology.</p> <h3>Computational Photography</h3> <p>Before we get into Night Sight specifically, it's essential to understand the concept of computational photography. In simple terms, computational photography uses algorithms and software techniques to enhance or manipulate images captured by a camera. This approach allows for more creative freedom and better results than relying solely on hardware capabilities.</p> <p>Google Camera is an excellent example of this, with its HDR+ technology combining multiple exposures into one well-exposed image and the Portrait mode using depth estimation to create bokeh effects. Night Sight is another application of computational photography that addresses low-light conditions.</p> <h3>Multiple Exposure Frames</h3> <p>At the heart of GCam Night Sight lies the idea of capturing multiple exposure frames at different ISO levels and shutter speeds. When you press the shutter button in Night Sight mode, your phone's camera will quickly capture several images (usually around 15) using varying exposures. The higher ISO settings make it possible to gather more light in darker areas, while the shorter exposures help prevent motion blur caused by hand shake or moving subjects.</p> <h3>Image Alignment</h3> <p>Since capturing multiple frames introduces potential alignment issues due to small movements between shots, GCam Night Sight uses advanced image registration algorithms to align each frame accurately. By identifying common features across frames and adjusting their positions accordingly, the software can create a seamless composite image with minimized ghosting or blurring artifacts.</p> <h3>Noise Reduction</h3> <p>One of the primary challenges in low-light photography is noise, which appears as random speckles or graininess in dark areas. To tackle this issue, GCam Night Sight employs multi-frame noise reduction techniques that analyze and average pixel values across all captured frames. This approach effectively suppresses noise while preserving details, resulting in a cleaner and sharper image.</p> <h3>Dynamic Range Expansion</h3> <p>In addition to reducing noise, Night Sight also expands the dynamic range of the final composite image. By merging shorter exposures with longer ones, it combines their respective strengths – accurate color representation and well-exposed highlights from short exposures, and detailed shadows from long exposures. This results in a balanced exposure that captures both bright and dark areas without sacrificing detail.</p> <h3>Conclusion</h3> <p>Google Camera's Night Sight mode is an impressive demonstration of computational photography techniques, allowing users to capture stunning low-light images with their smartphones. By combining multiple exposure frames, aligning them accurately, reducing noise, and expanding dynamic range, GCam Night Sight delivers remarkable results in even the darkest environments.</p>
<p>Si eres un entusiasta de la fotografía o incluso un usuario casual de teléfonos inteligentes, probablemente hayas oído hablar de Google Camera (GCam) y su tan comentado modo Night Sight. Esta función ha revolucionado la fotografía en condiciones de poca luz en dispositivos móviles, haciendo posible capturar imágenes impresionantes en entornos oscuros sin necesidad de usar flash. Pero ¿cómo funciona exactamente GCam Night Sight? Vamos a profundizar en los detalles técnicos detrás de esta impresionante tecnología.</p> <h3>Fotografía computacional</h3> <p>Antes de entrar específicamente en Night Sight, es esencial comprender el concepto de fotografía computacional. En términos simples, la fotografía computacional utiliza algoritmos y técnicas de software para mejorar o manipular las imágenes capturadas por una cámara. Este enfoque permite mayor libertad creativa y mejores resultados que depender únicamente de las capacidades del hardware.</p> <p>Google Camera es un excelente ejemplo de esto, con su tecnología HDR+ que combina múltiples exposiciones en una sola imagen bien expuesta y el modo Retrato que utiliza estimación de profundidad para crear efectos de bokeh. Night Sight es otra aplicación de la fotografía computacional que aborda las condiciones de poca luz.</p> <h3>Múltiples fotogramas de exposición</h3> <p>En el corazón de GCam Night Sight está la idea de capturar múltiples fotogramas de exposición en diferentes niveles de ISO y velocidades de obturación. Cuando presionas el botón de disparo en el modo Night Sight, la cámara de tu teléfono captura rápidamente varias imágenes (generalmente alrededor de 15) utilizando exposiciones variadas. Los ajustes de ISO más altos permiten captar más luz en áreas oscuras, mientras que las exposiciones más cortas ayudan a prevenir el desenfoque por movimiento causado por el pulso o sujetos en movimiento.</p> <h3>Alineación de imágenes</h3> <p>Dado que capturar múltiples fotogramas introduce posibles problemas de alineación debido a pequeños movimientos entre tomas, GCam Night Sight utiliza algoritmos avanzados de registro de imágenes para alinear cada fotograma con precisión. Al identificar características comunes entre los fotogramas y ajustar sus posiciones en consecuencia, el software puede crear una imagen compuesta uniforme con artefactos de desenfoque o duplicación minimizados.</p> <h3>Reducción de ruido</h3> <p>Uno de los principales desafíos en la fotografía con poca luz es el ruido, que aparece como motas aleatorias o granulado en las áreas oscuras. Para abordar este problema, GCam Night Sight emplea técnicas de reducción de ruido multi-fotograma que analizan y promedian los valores de píxeles en todos los fotogramas capturados. Este enfoque suprime eficazmente el ruido mientras preserva los detalles, dando como resultado una imagen más limpia y nítida.</p> <h3>Expansión del rango dinámico</h3> <p>Además de reducir el ruido, Night Sight también expande el rango dinámico de la imagen compuesta final. Al fusionar exposiciones cortas con largas, combina sus respectivas fortalezas: representación precisa del color y luces bien expuestas de las exposiciones cortas, y sombras detalladas de las exposiciones largas. Esto da como resultado una exposición equilibrada que captura tanto las áreas brillantes como las oscuras sin sacrificar detalle.</p> <h3>Conclusión</h3> <p>El modo Night Sight de Google Camera es una impresionante demostración de técnicas de fotografía computacional, que permite a los usuarios capturar imágenes sorprendentes en condiciones de poca luz con sus teléfonos inteligentes. Al combinar múltiples fotogramas de exposición, alinearlos con precisión, reducir el ruido y expandir el rango dinámico, GCam Night Sight ofrece resultados notables incluso en los entornos más oscuros.</p>
What is GCam Go?
¿Qué es GCam Go?
<p>GCam Go is a lightweight version of the popular Google Camera (GCam) application, designed to run smoothly on budget and mid-range smartphones. The app provides essential camera features while consuming minimal system resources, making it an excellent choice for users who want to take great photos without sacrificing performance.</p> <h3>Features of GCam Go</h3> <p>GCam Go offers several core features that enable users to capture high-quality images with ease. Some of these features include:</p> <ul> <li><strong>HDR+:</strong> This feature enhances the dynamic range of photos, allowing for better-exposed images in challenging lighting conditions.</li> <li><strong>Portrait Mode:</strong> GCam Go's Portrait Mode uses artificial intelligence to create depth-of-field effects, making the subject stand out against a blurred background.</li> <li><strong>Translate:</strong> The Translate feature allows users to translate text within images using Google Lens.</li> </ul> <h3>Benefits of GCam Go</h3> <p>GCam Go offers several advantages over the full-featured version of the Google Camera app, particularly for users with lower-end devices. Some benefits include:</p> <ul> <li><strong>Lightweight and Efficient:</strong> GCam Go is designed to consume minimal system resources, ensuring smooth performance on budget and mid-range smartphones.</li> <li><strong>Easy-to-Use Interface:</strong> The simplified interface of GCam Go makes it easy for users to access essential camera features without getting overwhelmed by options.</li> <li><strong>Google Lens Integration:</strong> GCam Go integrates with Google Lens, enabling features like text translation and image searches directly from the camera app.</li> </ul> <h3>Compatibility and Availability</h3> <p>GCam Go is officially available for devices running Android 8.0 (Oreo) or higher, and it can be downloaded from the Google Play Store. However, not all devices may support GCam Go due to hardware limitations or manufacturer customizations. In such cases, users can search for compatible third-party versions of the app on forums and websites dedicated to GCam.</p> <h3>How to Use GCam Go</h3> <p>Using GCam Go is similar to using any other camera application. After installing the app from the Google Play Store, simply open it and grant necessary permissions. The main interface displays essential features like HDR+, Portrait Mode, and Translate, allowing users to access them with a single tap.</p> <h3>Conclusion</h3> <p>GCam Go is an excellent choice for users seeking a lightweight camera application that still delivers high-quality images. Its simplified interface and minimal system requirements make it an ideal option for budget and mid-range smartphones, while its integration with Google Lens adds extra functionality. If you're looking for a streamlined camera experience without sacrificing photo quality, GCam Go is worth considering.</p>
<p>GCam Go es una versión ligera de la popular aplicación Google Camera (GCam), diseñada para funcionar sin problemas en teléfonos inteligentes de gama baja y media. La aplicación ofrece funciones esenciales de cámara mientras consume recursos mínimos del sistema, lo que la convierte en una excelente opción para los usuarios que desean tomar fotos de gran calidad sin sacrificar el rendimiento.</p> <h3>Características de GCam Go</h3> <p>GCam Go ofrece varias funciones principales que permiten a los usuarios capturar imágenes de alta calidad con facilidad. Algunas de estas características incluyen:</p> <ul> <li><strong>HDR+:</strong> Esta función mejora el rango dinámico de las fotos, permitiendo obtener imágenes mejor expuestas en condiciones de iluminación difíciles.</li> <li><strong>Modo Retrato:</strong> El Modo Retrato de GCam Go utiliza inteligencia artificial para crear efectos de profundidad de campo, haciendo que el sujeto destaque sobre un fondo desenfocado.</li> <li><strong>Traducir:</strong> La función Traducir permite a los usuarios traducir texto dentro de las imágenes utilizando Google Lens.</li> </ul> <h3>Beneficios de GCam Go</h3> <p>GCam Go ofrece varias ventajas sobre la versión completa de la aplicación Google Camera, especialmente para usuarios con dispositivos de gama baja. Algunos beneficios incluyen:</p> <ul> <li><strong>Ligera y eficiente:</strong> GCam Go está diseñada para consumir recursos mínimos del sistema, garantizando un rendimiento fluido en teléfonos inteligentes de gama baja y media.</li> <li><strong>Interfaz fácil de usar:</strong> La interfaz simplificada de GCam Go facilita a los usuarios el acceso a las funciones esenciales de la cámara sin sentirse abrumados por demasiadas opciones.</li> <li><strong>Integración con Google Lens:</strong> GCam Go se integra con Google Lens, habilitando funciones como traducción de texto y búsquedas de imágenes directamente desde la aplicación de cámara.</li> </ul> <h3>Compatibilidad y disponibilidad</h3> <p>GCam Go está disponible oficialmente para dispositivos que ejecuten Android 8.0 (Oreo) o superior, y puede descargarse desde Google Play Store. Sin embargo, no todos los dispositivos pueden ser compatibles con GCam Go debido a limitaciones de hardware o personalizaciones de los fabricantes. En tales casos, los usuarios pueden buscar versiones de terceros compatibles de la aplicación en foros y sitios web dedicados a GCam.</p> <h3>Cómo usar GCam Go</h3> <p>Usar GCam Go es similar a usar cualquier otra aplicación de cámara. Después de instalar la aplicación desde Google Play Store, simplemente ábrela y concede los permisos necesarios. La interfaz principal muestra funciones esenciales como HDR+, Modo Retrato y Traducir, permitiendo a los usuarios acceder a ellas con un solo toque.</p> <h3>Conclusión</h3> <p>GCam Go es una excelente opción para los usuarios que buscan una aplicación de cámara ligera que aún ofrezca imágenes de alta calidad. Su interfaz simplificada y requisitos mínimos del sistema la convierten en una opción ideal para teléfonos inteligentes de gama baja y media, mientras que su integración con Google Lens añade funcionalidades adicionales. Si buscas una experiencia de cámara optimizada sin sacrificar la calidad de las fotos, GCam Go vale la pena considerar.</p>
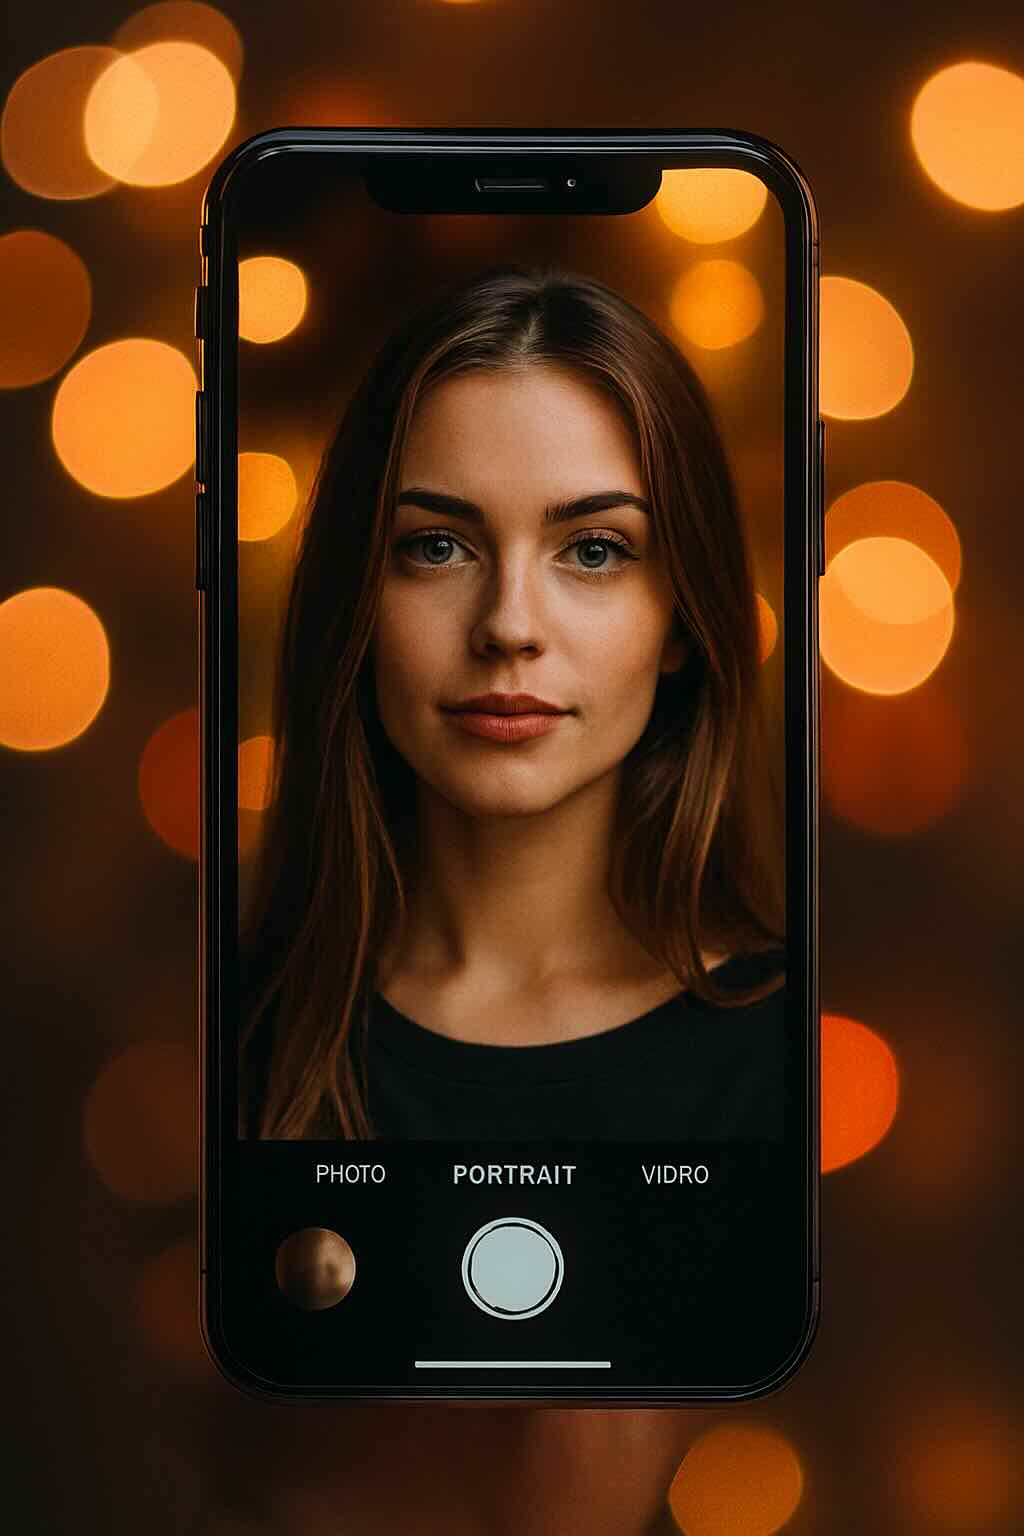
How Does Portrait Mode Work in Smartphones? A Detailed Explanation
¿Cómo funciona el modo retrato en los teléfonos inteligentes? Una explicación detallada
<p>Portrait mode has become a must-have feature for smartphone cameras, allowing users to take professional-looking photos with stunning depth of field. But have you ever wondered how this technology works? In this article, we'll explore the science behind portrait mode and how it creates those beautiful bokeh effects.</p> <h3>What is Portrait Mode?</h3> <p>Portrait mode is a camera feature that uses software algorithms to create a shallow depth of field effect in photos, making the subject stand out from the background. This technique is often used in professional photography to draw attention to the subject and create a more visually appealing image.</p> <h3>How Does Portrait Mode Work?</h3> <p>Portrait mode works by using machine learning algorithms and dual cameras (in some cases) to detect the subject in the photo and separate it from the background. Once the subject is identified, the software applies a blur effect to the background, creating a shallow depth of field look.</p> <p>One of the key technologies used in portrait mode is called "computational photography," which involves using algorithms to enhance and manipulate photos in ways that were previously only possible with specialized camera equipment. This technology has revolutionized smartphone photography, allowing users to take professional-quality photos with just a few taps on their phone.</p> <h3>Dual Cameras and Depth Sensing</h3> <p>Many newer smartphones have dual cameras, which allow for more advanced depth sensing capabilities. By using two cameras with different focal lengths, the phone can create a more accurate depth map of the scene and apply a more realistic blur effect to the background.</p> <p>The dual cameras work together to calculate the distance between the subject and the background, creating a depth map that is used to apply the blur effect. This technology allows for more precise depth of field control and creates more natural-looking photos.</p> <h3>Machine Learning Algorithms</h3> <p>Machine learning algorithms are also an essential part of portrait mode. These algorithms use vast datasets of images to learn how to identify subjects in a photo and separate them from the background. By analyzing thousands of images, the software can recognize patterns and features that distinguish the subject from the background.</p> <p>Once the subject is identified, the algorithm applies a blur effect to the background, creating a shallow depth of field look. The level of blur can often be adjusted in the camera settings, allowing for more creative control over the final image.</p> <h3>Conclusion</h3> <p>Portrait mode is an exciting technology that has revolutionized smartphone photography. By using computational photography, dual cameras, and machine learning algorithms, smartphones can now take professional-quality photos with stunning depth of field effects. Whether you're taking portraits of friends or family, or just want to add some creativity to your photos, portrait mode is an essential tool for any photographer.</p>
<p>El modo retrato se ha convertido en una función imprescindible para las cámaras de los teléfonos inteligentes, permitiendo a los usuarios tomar fotos con apariencia profesional y un impresionante efecto de profundidad de campo. Pero ¿alguna vez te has preguntado cómo funciona esta tecnología? En este artículo, exploraremos la ciencia detrás del modo retrato y cómo se crean esos hermosos efectos de bokeh.</p> <h3>¿Qué es el Modo Retrato?</h3> <p>El modo retrato es una función de cámara que utiliza algoritmos de software para crear un efecto de poca profundidad de campo en las fotos, haciendo que el sujeto destaque sobre el fondo. Esta técnica se utiliza a menudo en la fotografía profesional para atraer la atención hacia el sujeto y crear una imagen más atractiva visualmente.</p> <h3>¿Cómo funciona el Modo Retrato?</h3> <p>El modo retrato funciona utilizando algoritmos de aprendizaje automático y cámaras duales (en algunos casos) para detectar al sujeto en la foto y separarlo del fondo. Una vez identificado el sujeto, el software aplica un efecto de desenfoque al fondo, creando una apariencia de poca profundidad de campo.</p> <p>Una de las tecnologías clave utilizadas en el modo retrato se llama "fotografía computacional", que consiste en usar algoritmos para mejorar y manipular las fotos de maneras que antes solo eran posibles con equipos de cámara especializados. Esta tecnología ha revolucionado la fotografía móvil, permitiendo a los usuarios tomar fotos de calidad profesional con solo unos toques en su teléfono.</p> <h3>Cámaras duales y detección de profundidad</h3> <p>Muchos de los teléfonos inteligentes más recientes cuentan con cámaras duales, lo que permite capacidades más avanzadas de detección de profundidad. Al usar dos cámaras con diferentes distancias focales, el teléfono puede crear un mapa de profundidad más preciso de la escena y aplicar un efecto de desenfoque más realista al fondo.</p> <p>Las cámaras duales trabajan juntas para calcular la distancia entre el sujeto y el fondo, creando un mapa de profundidad que se utiliza para aplicar el efecto de desenfoque. Esta tecnología permite un control más preciso de la profundidad de campo y genera fotos con un aspecto más natural.</p> <h3>Algoritmos de aprendizaje automático</h3> <p>Los algoritmos de aprendizaje automático también son una parte esencial del modo retrato. Estos algoritmos utilizan vastos conjuntos de datos de imágenes para aprender a identificar sujetos en una foto y separarlos del fondo. Al analizar miles de imágenes, el software puede reconocer patrones y características que distinguen al sujeto del entorno.</p> <p>Una vez identificado el sujeto, el algoritmo aplica un efecto de desenfoque al fondo, creando una apariencia de poca profundidad de campo. El nivel de desenfoque a menudo puede ajustarse en la configuración de la cámara, lo que permite un mayor control creativo sobre la imagen final.</p> <h3>Conclusión</h3> <p>El modo retrato es una tecnología emocionante que ha revolucionado la fotografía en los teléfonos inteligentes. Gracias a la fotografía computacional, las cámaras duales y los algoritmos de aprendizaje automático, ahora los smartphones pueden tomar fotos de calidad profesional con impresionantes efectos de profundidad de campo. Ya sea que estés tomando retratos de amigos o familiares, o simplemente quieras añadir creatividad a tus fotos, el modo retrato es una herramienta esencial para cualquier fotógrafo.</p>